
Ok, maybe my favorite event to date! We
started out reading Mister Seahorse (yes, another Eric Carle book!), singing a
couple cute ocean songs and checking out a small sample of my giant ocean
collection. We then had three craft centers that the kids rotated through, a
snack and then a crowd favorite…Frozen Ocean!
*You may click on the picture collages to make them larger.
Here are the details for an
Under the Sea Event for
Sprouts and Seedlings (toddler/preschool and elementary age)...
*You may click on the picture collages to make them larger.
Here are the details for an
Under the Sea Event for
Sprouts and Seedlings (toddler/preschool and elementary age)...
The Stuff
|
The Prep
|
The FUN!
|
|
Check
out the book from your library or buy from your local book store or my fave
online book store, half.com.
Print
off song lyrics
|
1.
Read Mister Seahorse and discuss how the different babies are carried and
different camouflaging.
2.
Sing the ocean songs a few times. We added motions to the “I’m a Little
Fishy”!
3.
Let the kids touch ocean items.
|
We did the three crafts in centers with
and a helper at each one.
The kids rotated to each center!
Bubble and Fish Prints
I combined two of my favorite print techniques for this picture.
Bubble wrap and yes, real fish!
The kids rotated to each center!
Bubble and Fish Prints
I combined two of my favorite print techniques for this picture.
Bubble wrap and yes, real fish!
The Stuff
|
The Prep
|
The FUN!
|
|
Put
paint on plates (we used cupcake tins for shades of blue, green and purple for the bubble prints)
|
1.
Cover the bubble wrap with shades of blue, green and purple paint.
2. Flip bubble wrap upside down on blue paper (or just put the paper down on top of the bubble wrap). Rub lightly. Set aside. 3. Paint one side of fish ~we used orange and red.
*I like to move the fish to a clean paper/newspaper
before we print because they tend to get the paper behind the fish full of
paint which will then transfer if it is not moved.
4. Take the blue bubble print paper that was made earlier and put this down facing the painted fish.
5.
Lightly press on the back of the blue paper being careful not to shift the
paper. Make sure that your fingers press along all of the fins and tail.
6.
Peel off and look at your very fun print!
|
Flying Jelly Fish
We have seen several versions of these using different cups/bowls around the blog world. We thought they turned out beautiful and liked them hanging together!
| The Stuff |
The Prep
|
The FUN!
|
|
Cut
tissue paper into squares or let the kids tear them on their own
Cut
yarn
Poke
hole using a nail in the top of the fruit cup
|
1.
Kids modge podge the inside of the fruit cups and sprinkle glitter inside.
2.
Then put tissue squares on top of the glitter and add more modge podge. Let
sit.
3. Kids choose 6-8 pieces of yarn and lay out together.
4.
Adult help if younger – Use one skinny piece of yarn to tie around the middle
of the yarn clump. Take the other end of the yarn and push it through the
hole in the top of the fruit cup.
Hang
in a sunny spot!
|
Shaving Cream Marbled Fish
This is one of my favorite messy paintings because it turns out beautiful even if you have a very young painter. It can be adapted for any theme and is under my “Tweakable Crafts”.
This is one of my favorite messy paintings because it turns out beautiful even if you have a very young painter. It can be adapted for any theme and is under my “Tweakable Crafts”.
The Stuff
|
The Prep
|
The FUN!
|
|
Cut
fish shapes out of light cardboard (ie cereal boxes)
|
1.
Use fish tracer, pencil, paper and scissors to trace and cut out a fish
shape.
2.
Put shaving cream on cookie sheet and smooth out with squeegee ~ about ½ inch
thick.
3.
Squeeze dollops of paint on top of shaving cream.
4.
Use popsicle stick or chopstick to swirl paint.
5.
Place fish shape on top of shaving cream and paint and press lightly.
6.
Pull paper off and use squeegee to remove shaving cream and paint.
*you can do both sides!
|
| The Stuff |
The Prep
|
The FUN!
|
*We also had watermelon |
Cut
cucumber (smiles) and red pepper (front claws)
Cut
croissants in half sideways
Put
food items on plates.
|
1.
Show kids a sample crabwich.
2. Kids use their food items to create their own!
3.
Then of course they gobble it down!
|
Frozen Ocean ACTIVITY
Ok, this is a must do for all moms/dads/teachers! I recommend just having a frozen tub of “whatever” (doesn’t need to be sea creatures) on hand for any given moment when you need an hour to get something done or just want to watch your kids problem solve. The kids LOVED this and were completely focused! It was great how they would think of new ideas and tools to free the sea creatures – those wheels were churning for sure! I got this idea from Happy Hooligans Blog!
The Stuff
|
The Prep
|
The FUN!
|
|
Freeze
sea creatures in colored water in large tubs – I did about 4 layers so that the sea creatures wouldn’t all be at the
bottom
|
1.
Kids use all of the supplies to free the sea creatures from the ice!
|
More ideas…
Ocean in a bottle
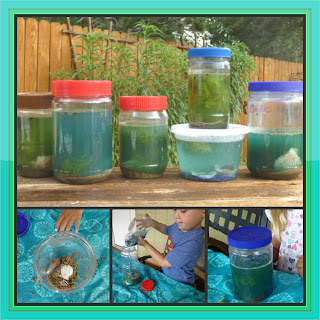
We first added some sand, then some blue glitter, then shells and moss for seaweed. Then we added the blue water. I put some glue around the lid and I would recommend putting some strong tape around the lid as well.
Sea Creature Relay Race
We played this later that afternoon with some neighbor kids. The water in the water table was blue and full of sea creatures from the Frozen Ocean. We added some shaving cream and it turned murky so you couldn’t see the sea creatures. Kids would run to the water table, grab a sea creature and throw it in a bucket. When it hit the bucket the next person on their team could go. Very fun!
Please BRAINSTORM your
ideas/suggestions in the COMMENTS below for the Under the Sea Event!
Happy Crafting
~Sara, Becky and Keri
Happy Crafting
~Sara, Becky and Keri


The world hopes for even more passionate writers like you.
ReplyDeleteBelow are some webpages really worth checking out
ReplyDeleteHere is a good Weblog You might Come across Fascinating that we Encourage You
ReplyDeletewonderful put up, very informative.
ReplyDeleteI’m wondering why the other specialists of this
ReplyDeletesector do not realize this.